My father-in-law is a retired Service Engineer / Electrician and is a genius with mains powered items like mechanical timers, relays, solenoids and also plumbing systems. He's built himself an automatic watering system for garden, greenhouse and hanging basket using various salvaged parts and wants to consolidate it down to one simple to maintain system.
For this he had a Moeller Easy 412-AC-R programmable relay that he wanted to use to control 4 independent watering systems. His skills (mains, wiring, plumbing etc) are complementary to mine (occasional exercise, drinking coffee, hacking poor quality code) so he asked me to help him program the relay.
The unit is shown on the image below:
The unit is AC powered and has:
- Eight screw terminals to which you can connect mains inputs (240V AC in the UK). These are the "I" inputs at the top of the image.
- Four pairs of screw terminals which are relay contacts through which you can switch mains power items. These are the "Q" outputs at the bottom of the image.
- The cursor buttons that act as "P" inputs.
- A set of other internal controls like counters and timers.
- A UI comprising the buttons shown on the picture above which let you create "circuit diagrams" on the LCD screen.
So using the UI you create circuits on the screen that connect together inputs (in series or parallel), trigger timers and control outputs. A few hours tinkering and grudgingly RTFMing led me to this circuit diagram:
In pseudo code this would be written:
if (P1 == Pressed) or (I1 == True):
set Output Q1 = Switched
while Time < T1:
#Do nothing
set Output Q1 = Unswitched
So either pressing button P1 (left cursor) or applying mains voltage to input I1 connects the contacts on relay Q1. Timer T1 then starts and, when it expires, the contacts on relay Q1 are disconnected.
This code was replicated three times, each time using I1 and P1 as triggers but using Q2, Q3 and Q4 and T2, T3 and T4. In this way a single input can be used to control 4 outputs, each with independent timers (because, say, tomatoes in the greenhouse need more water than hanging baskets).
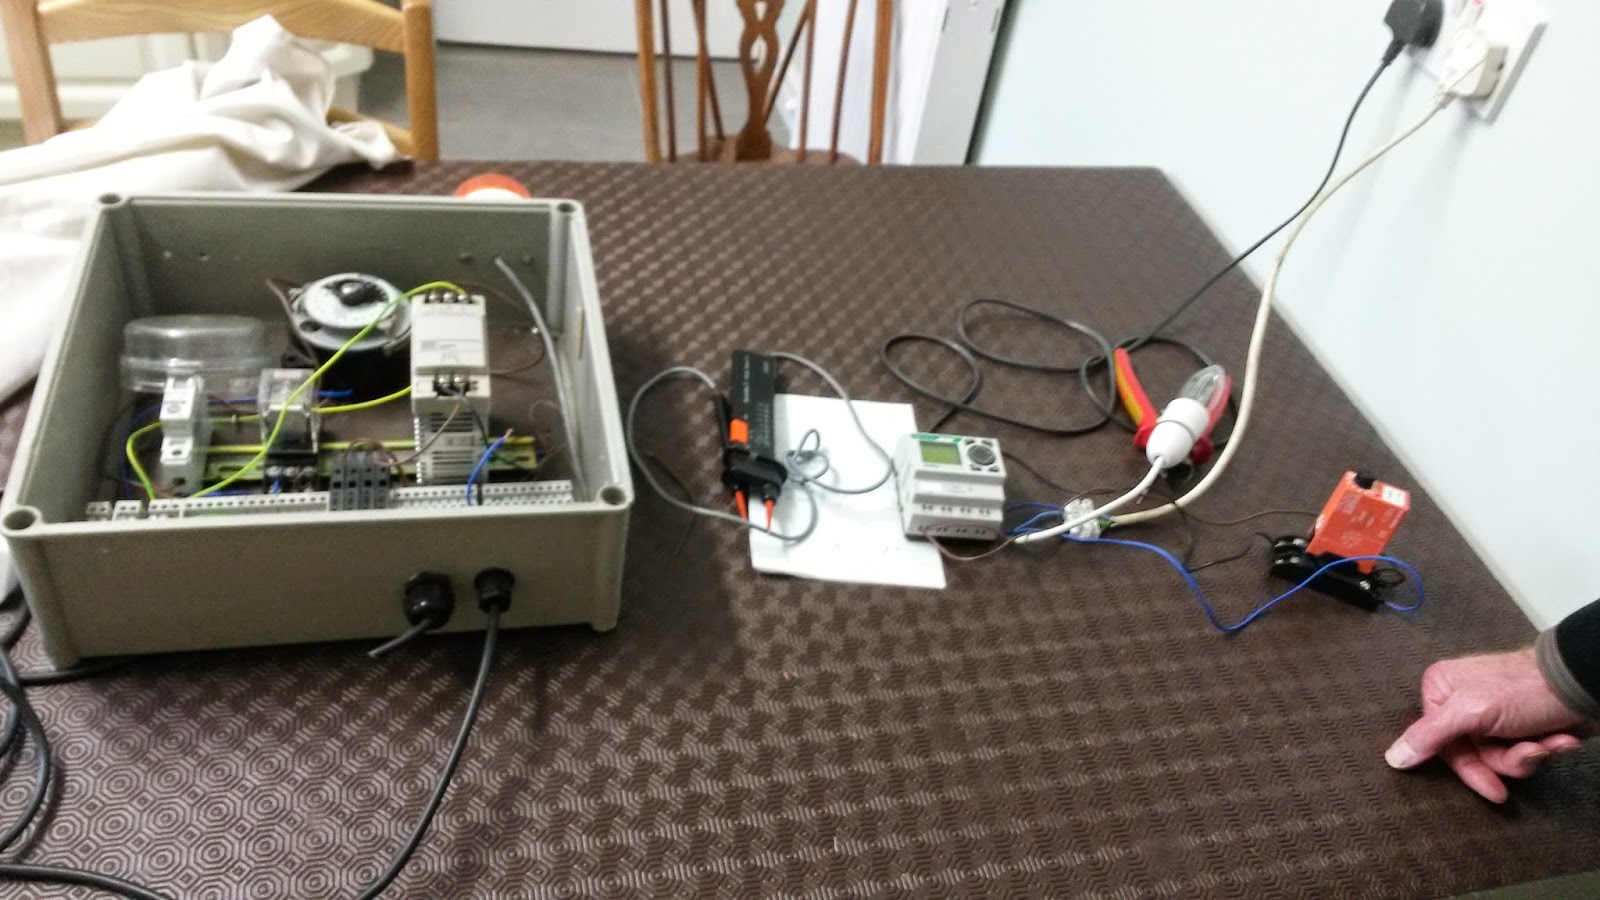
The picture below shows the full test rig:
A light bulb is wired to one of the Moeller relays and the orange timer unit on the far right is wired to the Moeller input. This timer is in turn connected directly to mains power for test purposes. What happens here is that when the mains is switched on and left on, the orange timer can be set to only provide a mains output for a very short period of time (~6s in our case) to trigger the Moeller input. This in turn triggers the Moeller outputs for the programmed period of time.
In the final system the mains input will be replaced by a mechanical timer (can be seen in the metal box on the left towards the top) that can be configured to come on at certain times of day but is not very precise in terms of how long it can be set to come on for.
The Moeller outputs will be used to switch a set of solenoid valves that control the mains pressure water supply to the watering systems around my father in-law's house.
So what we have is:
- An imprecise time of day mechanical switch.
...triggering....
- A precise trigger.
...which acts as the input to....
- The Moeller relay with four separate timer controlled relays
...which controls...
- A set of solenoid valves that control the water flow.
So overall this is very different to my usual tinkering which involves Raspberry Pis, Python, APIs and weedy DC electricity. Great fun!


No comments:
Post a Comment